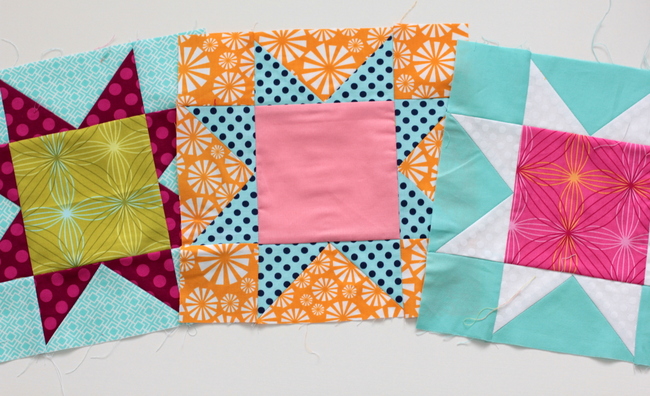
Making a star block is so easy! And a quilt full of these sweet little blocks is just the best.
For each star block you’ll need two prints – one for the star and one for the border. The grey print is my star and the green is my border.
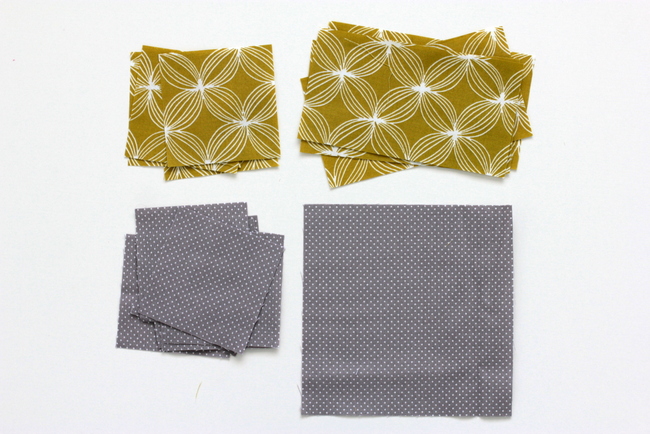
For the star:
- Cut 8 – 3″ x 3″ squares
- Cut 1 – 5.5″ x 5.5″ square
For the border:
- Cut 4 – 3″ x 3″ squares
- Cut 4 – 3″ x 5.5″ rectangles
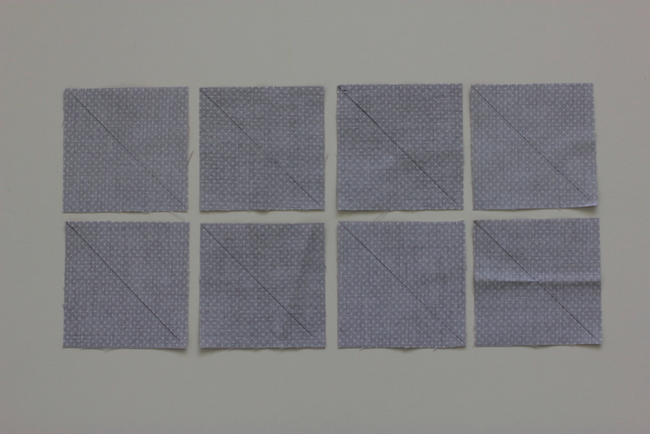
On all the star point squares (8 – 3″ x 3″) draw a pencil line from corner to corner on the wrong side of the fabric.
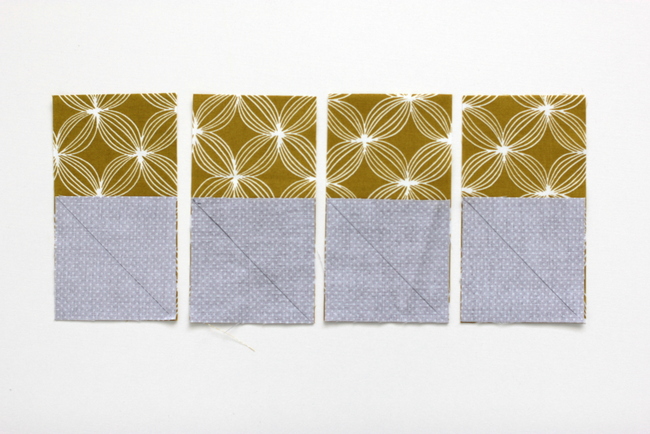
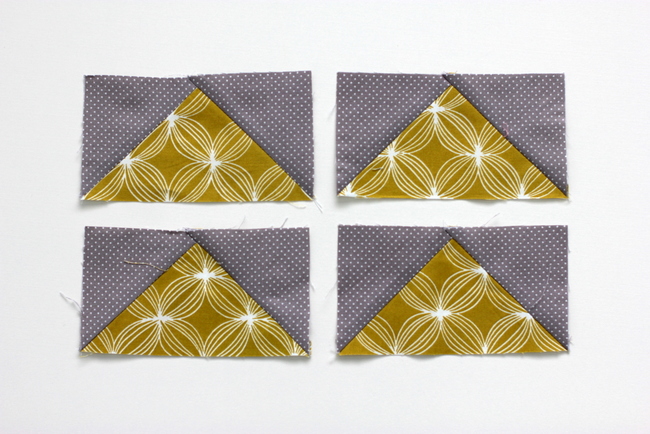
Lay one star square on top of one border rectangle and sew along the pencil line. (4 total)
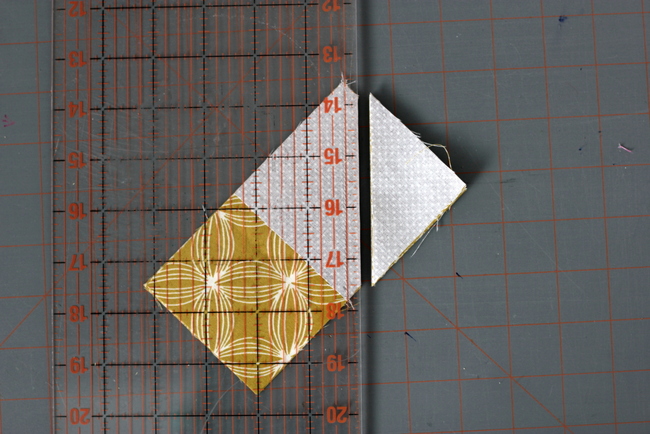
Trim off the excess and press.
The star point blocks are halfway finished!
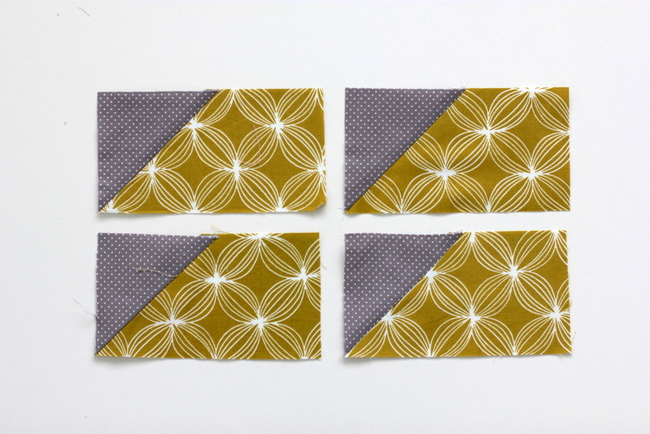
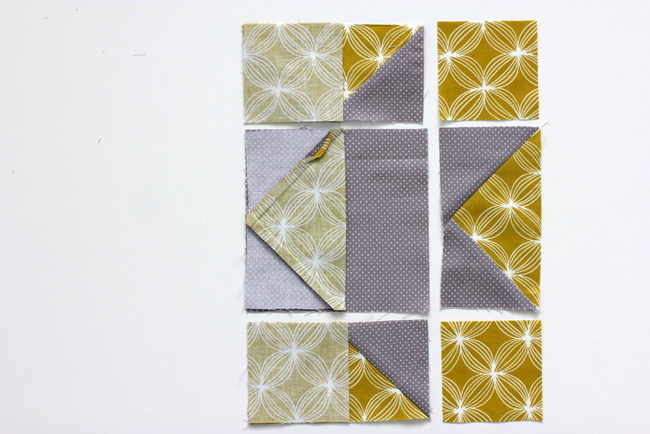
Lay the other 4 – 3″ squares on the rectangle just as pictured and sew on top of the pencil line.
Trim corners and press open.
The points are finished!

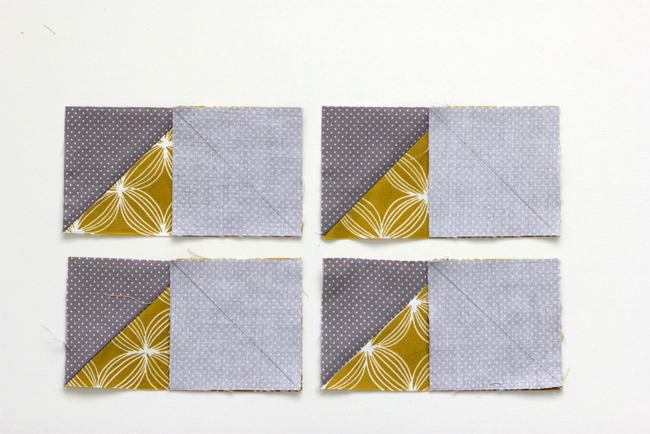
You should have 4 border squares and the 1 large center star square left over – lay all your blocks out as pictured.
The fastest way to finish these blocks is to chain piece – so lay out your blocks as pictured and sew all three of those sections together, one after another.
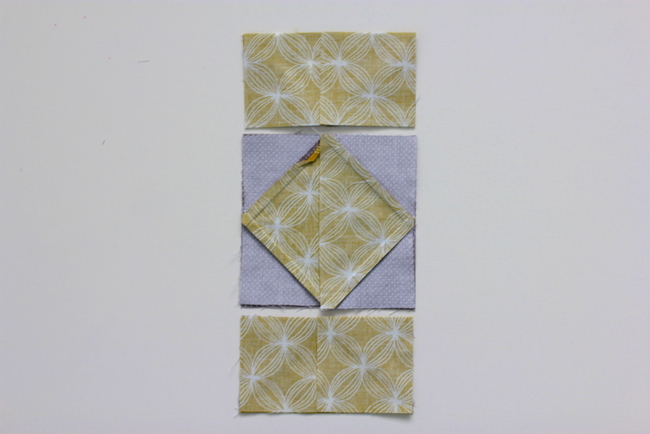
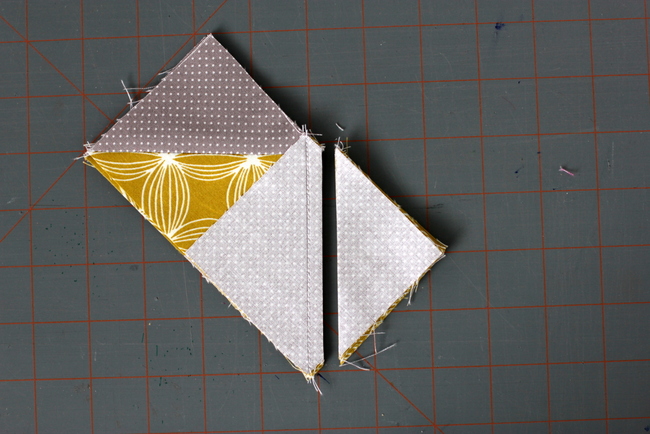
Then sew the right side pieces as pictured.
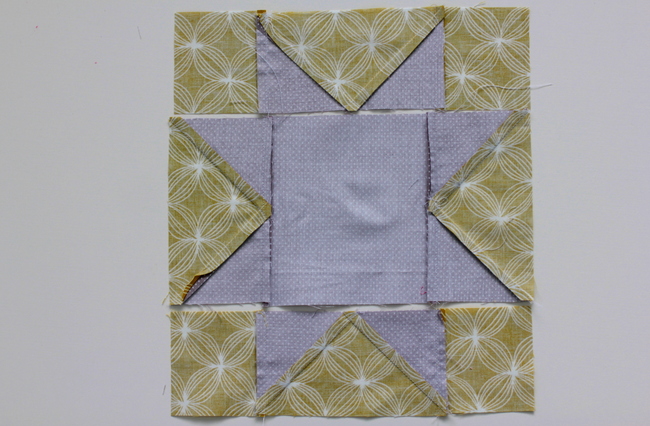
Press the seams open – press the top and bottom row seams out and the center row seams in.
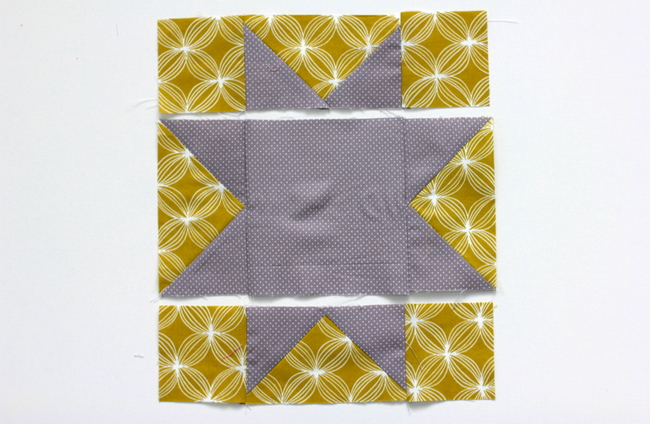
Now sew the rows together. 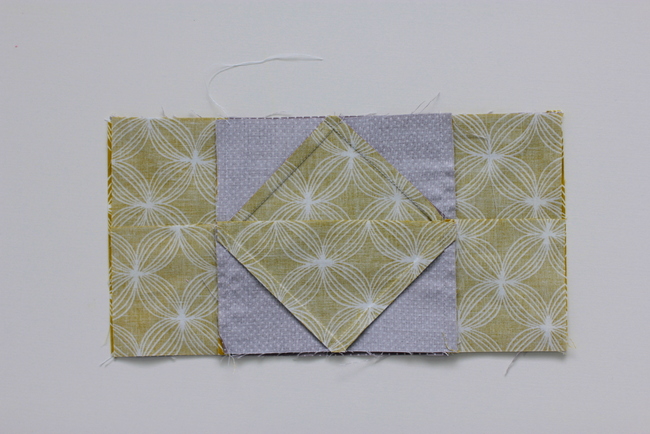

And press seams either up or down, you choose!
And that’s it – make a billion more and make yourself a quilt!


