Are you a cardigan girl? I TOTALLY am.
Before we begin, be sure to check out what other clothing re-purposing I’ve done–like this T-Shirt grocery bag video tutorial for example.
Now back to the cardigan.
This tutorial on Pinterest inspired me and I promise you that soon I will have more cardigans than is healthy for a girl.
Here’s what you need to transform your tired sweater into a fresh new cardigan:
- sweater
- tailor’s chalk or other fabric marking tool
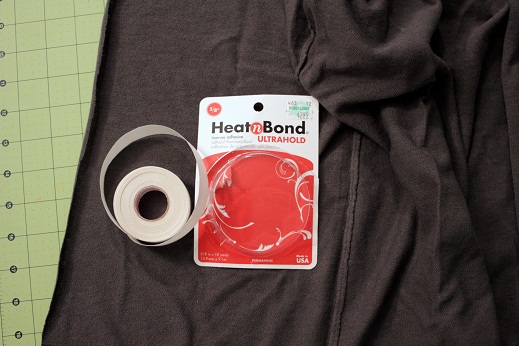
- Heat’N Bond ultrahold iron-on adhesive (5/8″)
- iron
- standard sewing supplies (thread, scissors, machine, etc.)
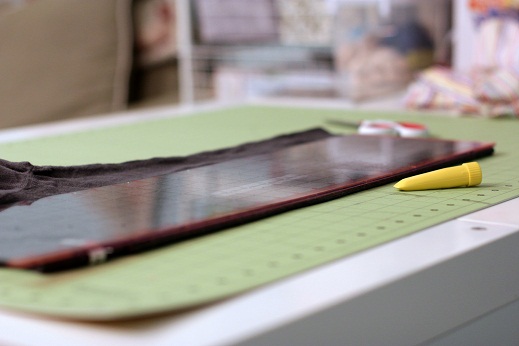
1. Fold your sweater in half through the center front, making sure the collar, sleeves, and hem are all lined up and straight. Lay a rotary ruler on top of the sweater and run the tailor’s chalk along the fold to mark the center. Open it up and make sure it looks centered.
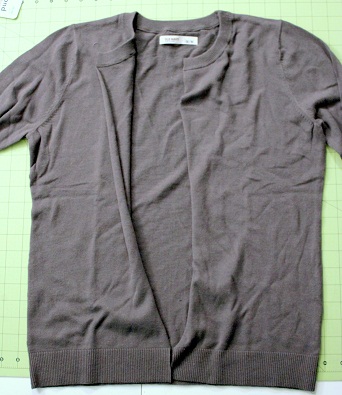
2. Cut all the way up through the front of the sweater only.
3. Open up the sweater and smooth out the cut edges – they will curl a bit.
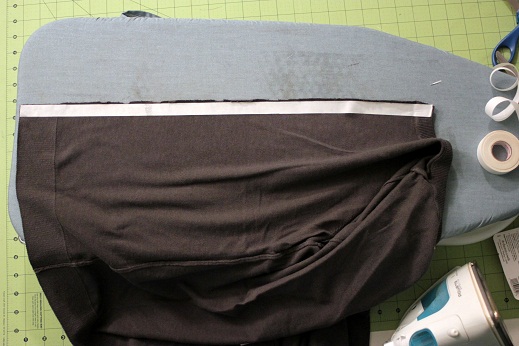
4. Following the HeatnBond instructions, press the iron-on tape right up next to the cut edge on the wrong side of the sweater. Do on both left and right front pieces of the now cardigan.
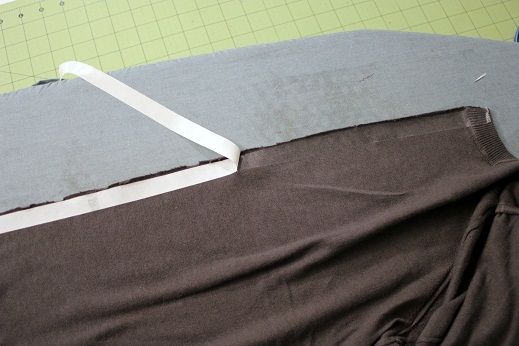
5. Peel the paper backing off, turn the edge back on itself so it’s wrong sides together with the adhesive in between and press to create the finished center edge.
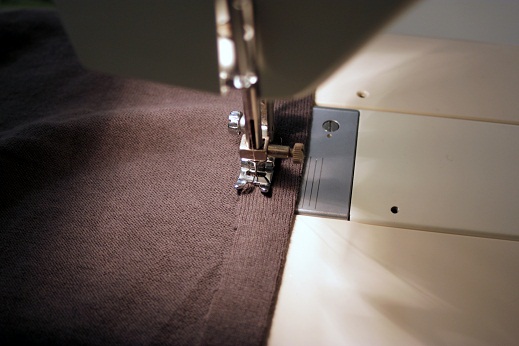
6. Sewing with the unfinished edge on top, stitch the two layers together. (I used the 5/8″ line on my sewing machine.) DON’T STITCH up through the collar part with your machine, tack it down by hand or there will be a very visible and ugly line there.

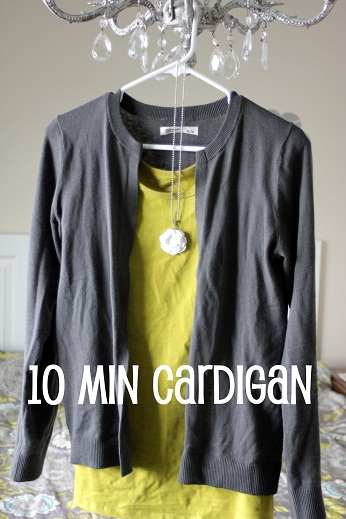
Finished! The whole thing took me about 10 minutes and I’m going to our local thrift store this afternoon to see what sweater treasures I can find to make MORE CARDIGANS!
Before I started I thought I might want to sew pearl buttons or something on to make it look more like a real cardigan, but nah. I love it just how it is!
Thank you! I am going to try this
This is sooo cool. Thank you so much!
Oh. Mygod. This shall be the salvation of a pull-over that I DEARLY love, but that has a teeny moth hole right in the center front.
Do you feel the love? Because *LOVE*
I totally am excited to try this. It turned out so cute.
I think I will try this with a long sleeve t’shirt –
I do this with sweat shirts.
I have been wanting to do this since I saw it on pinterest a couple weeks ago. I finally tried it this week and just blogged about it. I linked back to you. I love this and will definitely be finding more sweaters to turn into treasures! :) Thanks!!
love it!! I used to do this with sweat shirts for adults and babies and children–then embelish them really fun
I bet you could apply the same principal to the sleeves if you wanted 3/4 length. May have to taper them a little. Going through my closet for a new wardrobe.
this is a super idea, would also be great with sweatshirts. I find new or practically new ones at my resale or Goodwill shop
Really liked this idea. good recycling.
Thanks for the idea! I suck at crafts but can’t stop trying new ones, and I am actually quite good at this! I recycled 2 hooded sweatshirts this morning and 2 badly fit sweaters into cardigans that look great on me. I appreciate the simplicity of your tutorial.
This looks pretty easy. Thanks for sharing.
Love this idea. I am worried about the sweater unraveling before the strip is ironed on so I might try drawing the chalk line with the sweater inside out and ironing on both strips either side of the centre line before I cut. It would stop it curling.
What a brilliant tutorial, so simple and effective. Thanks so much for sharing! Amy XO
I did this years ago with sweaters and also sweat shirts.
So cute! I can’t wait to try this!!!
Fantastic Idea! Thank you!
It looks like a piece of cake ! I’m gonna try it soon :)
Thank you so much for sharing. I have a slight obsession with cardigans. I will be making a few of these. Can’t wait!
I tried thatwith a grey pull over from Goodwill and it turned out well. i sewed shell buttons all the way down the one side… love it ! Now, i have a question…i love sweatshirts in the winter but it seems you cannot find one anywhere thats NOT gathered at the bottom.. i hate those cause i kinda have big hips ( i cant believe i said that ) but the gathers just makes me look bigger.. how would i make a straight bottom no gathers ?????
I also have an obsession with cardigans and am always on the lookout for them at the stores. I may have a couple of sweaters that I may be able to turn into cardigans. Thank you so much for this tutorial. :-)
ok…lemme say this…its an amazing idea to reuse your old sweater…I’ve one old sweater its so cute but its kinda short for me now n I was thinking of chucking it out…but thanks to you..:-*
I love cardigans! I love this tutorial too! Thanks for sharing it!
Helen
Blue Eyed Beauty Blog
I love this idea! I am such a cardigan girl too and will give this a try.
This is a good way to make a cute sweater even better. I see pull over ones at Goodwill that I like, but I prefer a cardigan. I never thought of transforming one into the other! Clever lady ;) Thanks!
I just did this with a nice chunky separating zipper, and it’s so cool!
Cute! Great idea, I’d love to see a photo!
sweet!
I am so very thankful for this tutorial!! I look awful in sweaters, but wear the heck out of cardigans!
Super idea. I have a tired light blue one that I got from goodwill for 2.50.
Can’t wait to try your way.
have fun
JH sewing in NH
I used an aqua v-neck long sleeve tee I got from Target on clearance. I followed your instructions, but took it a few steps further. I added buttons and buttonholes because I like to be able to close my cardigans. It didn’t really hang right when I was done so I cropped the bottom and the sleeves and used hem tape to finish the edges.
The tape really helped to create a neat finished look. No one believes that I made it.
Thanks!
Ha ha, I do this all the time, but as we are on a farm I leave the front as it is cut, but now that you have shown how to tidy front, I will do the same for going to town cardi’s. Thanks.
Wow! This is amazing! I have to try this!
I had googled baby bibs made from hand towels and discovered your site. It is truly great . I love the sweater made into a cardigan…can’t wait to try it..
love your site….
I’m definitely going to the thrift store and buy a sweater. This cardigan looks so simple that I’m going to try this. Thanks for posting this tutorial.
OMG, I’m so glad this was re-posted from 2012. It’s easy to find pull-overs but harder to find cute cardigans. I’m am so getting the scissors out for all those old pull-overs that I couldn’t bear to throw away but never wear. They’ll be fantastic as cardigans. Thank you tons and tons!!!
this is such a great idea. i love cardigans but have a hard time finding ones that fit right. i am making a mental list in my head right now of the shirts in my closet I am going to try this with, as soon as I get to the store to get some heanbond. I can’t wait to do this for my daughter too. she loves to have a “jacket” on and gets frustrated when she can’t zipper them up, so this would solve that problem. adding this to my list of must-do-soon stuff. thanks for the wonderful tutorial and great pics.
Fabulous tutorial. Love cardigans! Thanks for sharing. :)
Thank you! Used this today to improve on an awesome online buy. Turned out amazing!
How long might the adhesive hold the fabric without sewing?
I really don’t know…I wouldn’t think it would hold up through very many washes, but I don’t know for sure.
Would it be easier to cut and bond if the tape was adhered before cutting?
I am working with a thicker jumper (mens) and having difficulty, taking longer then I thought….. but… persistence is key. Thank you for the good idea.
Thanks for the tutorial! I took out my nice fine green jumper for winter and found two small moth holes right in the front………following your instructions it is now a cardie and has a new lease of life!
I cant wait to try this! It is such a great idea!!!
Thanks for sharing!
Hi
I love this idea. I have an illne where I constantly have to take off or put on layers of clothing because of my body temperature. Part of my wardrobe contains many sweaters that are not cardigan. I have sweaters that are not a tight knit material like you show here on your web page. How would you approach a sweater that is more of a loose knit or crocheted fabric where if you cut the sweater down the middle you will have many loose threads of yarn. I am afraid to attempt that type of sweater because of all the loose pieces of yarn. Do you have any suggestions? I have so many sweaters I wish I could wear but I get too hot in them. Thanks
Kim
I’d love to share this on my website at: http://www.thethreadfultruth.com/
Also if you’re interested in sharing your work on a Pinterest group board I’d love to have you as a contributor. https://www.pinterest.com/Threadfultruth/
Do you know the name of the Heatbond in the UK or any ideas of something else that can be used?
Its a great idea.
Evelyn
This idea is just brilliant, not heard of this at all. I so want to try this, off to the haberdashery tomorrow. I have so many nice jumpers that I do not wear yet if made into a cardigan, certainly would. Thank you.
Thank you for this, I like this for re-purposing Tees and such. If you’re worried about fraying you can use FrayCheck liquid made by Dritz and found with sewing notions. It also works on those tiny holes in knits (use a dot on the inside and it prevents the hole from getting bigger).
thank you for this :)
if they are slightly oversized they work better (remember you folding in a bit each side) plus, if you add a open zip you can make it into a zippered cardigan so you could do it up if you wanted.
Hello,
Awesome idea, can you also do this with a pullover v-day neck and get the same results?
Thanks for the great tutorial….I’ve saved a piece of knitted yardage to make a sweater, wondering just how to go about it, think this technique with fusible tape will work and I will stay stitch the sleeve and armholes! I’m going to make this yet. :o)
This sounds like a great idea! I must try this!
This looks so easy to make..Gives me a reason to pull out my machine
I knew someone who used bias cut out from pretty fabric to make new edges and necks on cardis like this.
Thank u. — I really wanted to turn some of my T’s into a little coverup.
I don’t sew much but with yr help I will try!! I am older & busty so just a T would look better like this!
Thank you !, M
Thankyou!! What a great way to get the style you want.