From Old Jeans to Pot Holders
I love to combine crafting with reusing – there are so many materials and objects in our homes that have more than just traditional uses. Old jeans are one of my favorite things to reuse and craft with. Because denim is so sturdy, a pair of jeans that are no longer wearable usually still have plenty of miles left to go as something else. And if you don’t have old jeans lying around, you can always pick them up for $.50 a pair at yard sales.
Making pot holders is my top favorite craft with old jeans. I’ve also made quilts and shoulder bags, but potholders are so quick and easy and can be made from 100% reused materials.
Here’s how to do it:
Before you begin cutting out the pieces for the pot holder, cut all the way up one seam (the outer seam would be easiest) so you can open the jeans up and have a single flat surface to work with.
1. Cut the front piece.
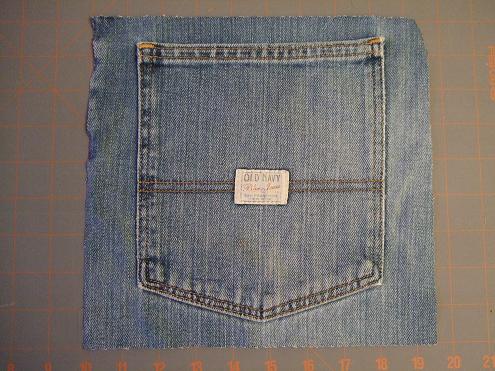
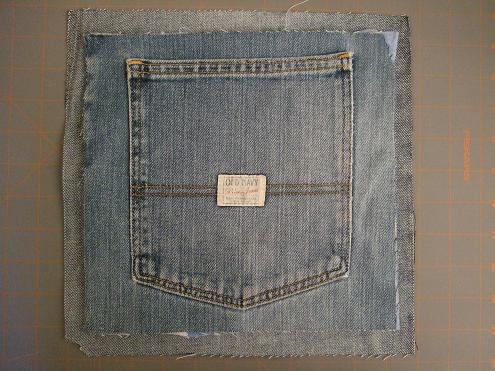
With a rotary mat and cutter, cut a square around the back pocket on an old pair of jeans. For a 10×10 potholder, cut the square 10 x 10, centering the pocket.
2. Cut the back piece.
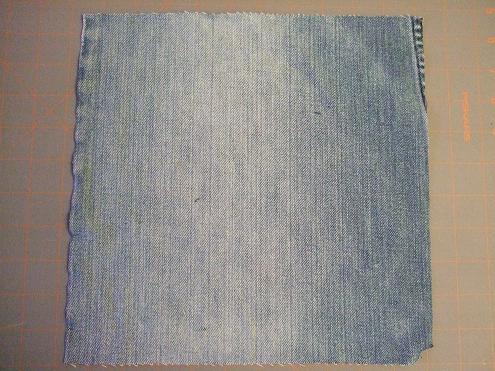
For a 10×10 pot holder, cut the back piece 11.5 x 11.5. You’ll need 3/4″ on each of the four sides of the square to fold under and enclose the raw edges, so you’ll be adding 1.5″ extra on both the height and the width.
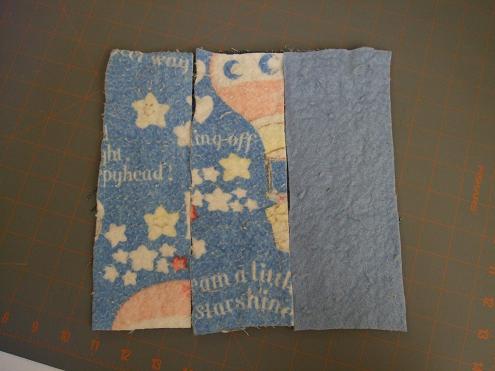
3. Cut the batting.
For the batting you can use old blanket scraps, sweatpants or other fleece scraps, or polyester fleece batting. Cut the batting to be the same size as the top piece, 10×10 for this pot holder.
 Abutting lateral edges Abutting lateral edges |
 Finished view Finished view |
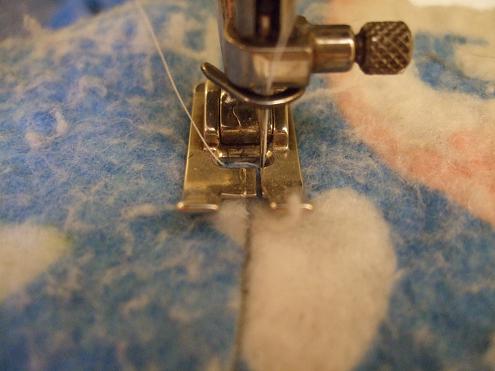
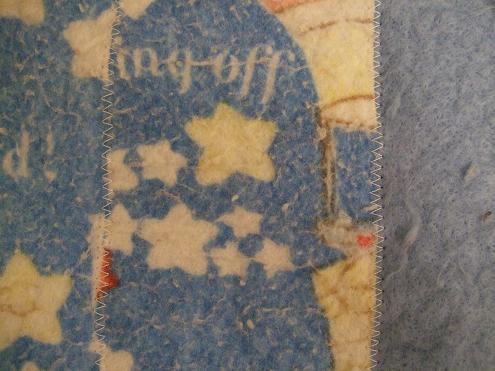
If you only have strips of blankets, clothing, or batting, abut the edges and zigzag them together using a stitch width of 4 and stitch length of 2. You don’t want to create a seam, so abutting the edges is the best method.
4. Sandwich the batting piece in between the top and bottom pieces, lining the batting up exactly with the top piece and centering the top piece over the bottom piece.

5. Fold down the edges on the top and bottom first. Turn each raw edge under 1/4″ and then fold that over another 1/2″ so that the edge of the top piece is to the edge of the fold.
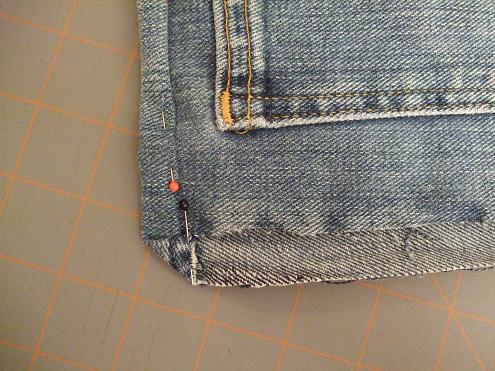
6. Pin the corner. Fold the bottom edge up at a 45 degree angle to the top and side edges.
7. Fold the side edge up 1/4″.
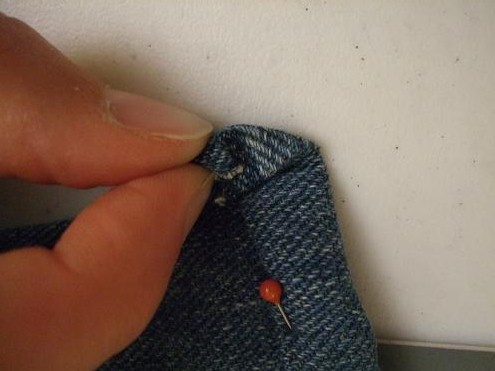
8. Fold the side up 1/2″ so that the top piece is underneath the side piece and the fold is diagonal.
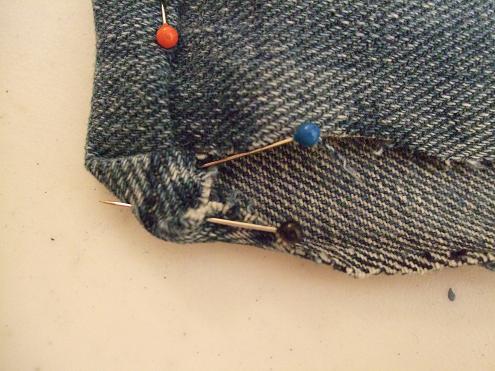
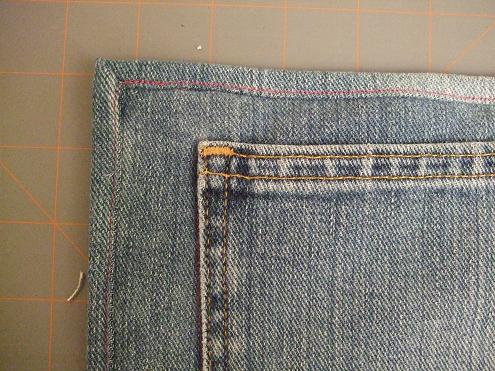
This is how the corner should look. This step is tricky because the denim is so bulky. Be patient and use lots of pins.
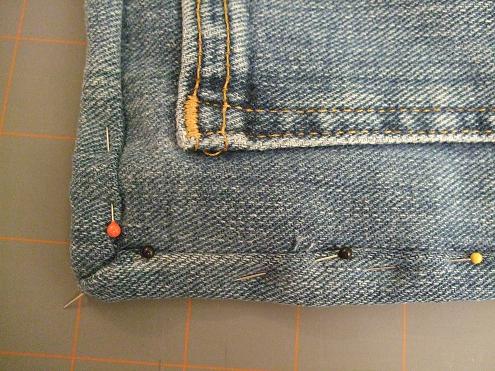
9. Finish pinning and preparing the corners by repeating the above steps. When you’re finished, the top and bottom hems should be underneath the side hems.
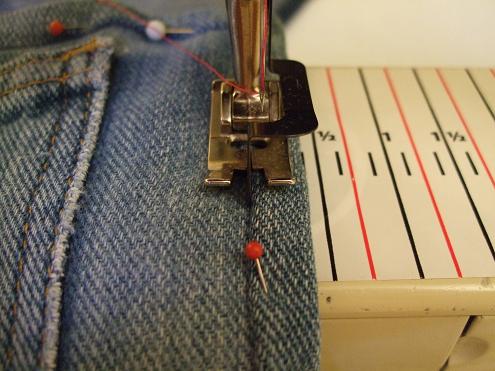
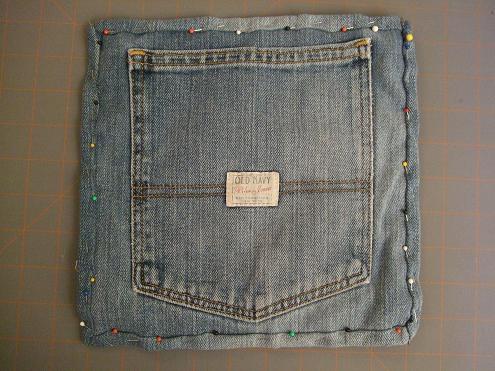
10. Choose a color of thread (I used hot pink on mine), and, using your blind hem foot, sew 1/8″ inside the hem edge. Because the corners are so bulky, you will have to stop and lift up the presser foot, but be sure to leave the needle in the down position so the fabric doesn’t slip.

11. Sew around the 3 outer edges of the pocket through all layers – don’t sew across the top edge of the pocket. Use your blind hem foot again, but keep the needle in the center position so the stitching is as close to the pocket edge as possible.
Here’s a close up of what the corner should look like.
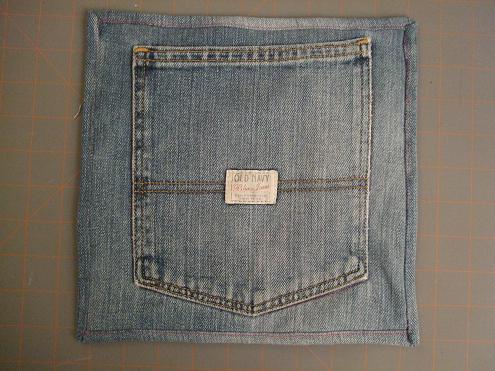
And…All done! You can use the pocket like a glove/oven mit or as a pot holder on the table. These are so easy to make, and so cute too! You can do these any size your jeans will allow, even mini ones from kid’s jeans.


