Pillowcase Tutorial

23 comments

p3310126.JPG

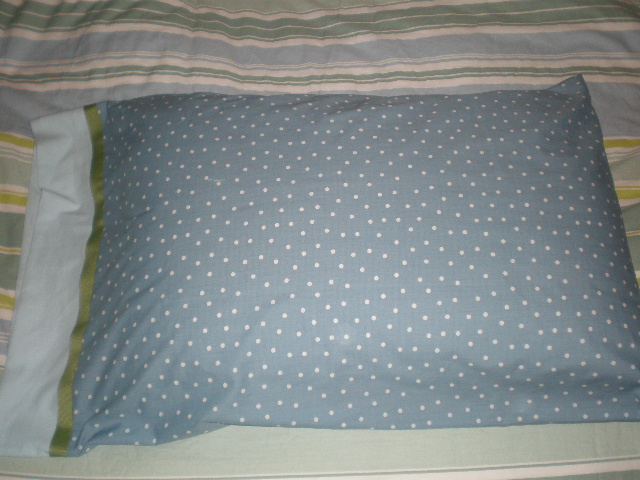
I made the above pillowcase Monday night and wanted to share it with you all. If I left out any steps or if anything is unclear, please let me know so I can make this tutorial better…it’s my first one so there’s lots of room for improvement. And my camera isn’t the best for this sort of thing, so please excuse some of the pictures. Here we go…

Materials for 1 pillowcase:

  • 1 yard of fabric for main pillowcase
  • 1/2 yard of coordinating fabric for end band
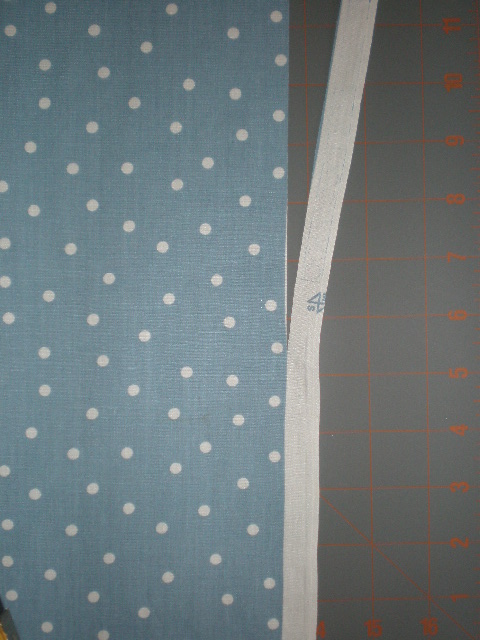
  • strip of coordinating fabric/ribbon for band transition – 43 inches long and however wide you want (somewhere between 2 – 5 inches would be best).
    • If you want 3 inches of band transition strip showing on the outside, cut the piece 3 1/2″ wide to accommodate the 1/2″ seam allowances.

Pillowcase will be sewn using 1/2″ seam allowances.

p3310054.JPG

The first thing I do when sewing something, besides preshrinking the fabric using the care instructions on the end of the bolt it came from, is to find the straight grain. It’s impossible to cut fabric exactly straight on the grain and since the people at the fabric store cut it, it’s inevitably cut crookedly. Sometimes my fabric has been cut so crookedly that several inches are wasted. You don’t want to start sewing something using a crooked grain line, so this step is really important.

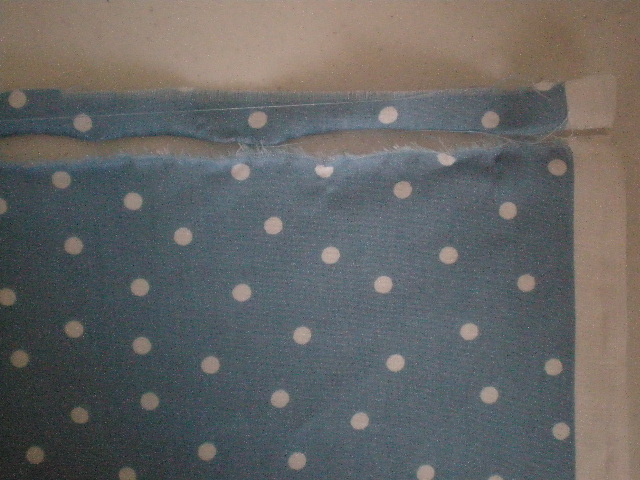
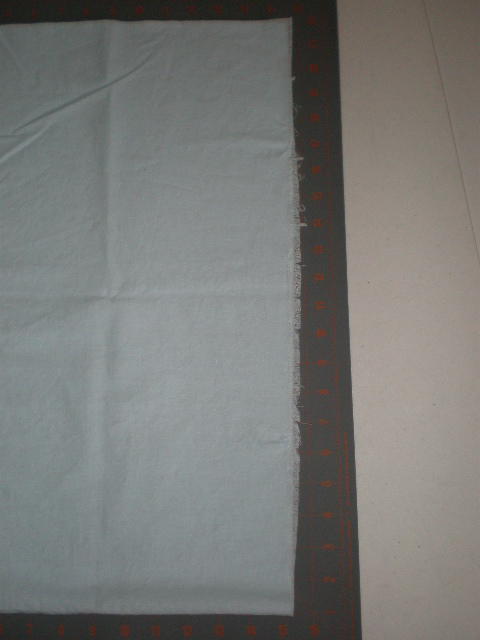
When you tear fabric, it tears perfectly on grain. Make a little snip, 1/2 – 1 inch, perpendicular to the selvage edge of the fabric and tear it all the way across. Sometimes the grain is off by more than the amount you’re cutting off the top so your strip will come off before you get to the other side. You need to keep tearing a little off the top until your tear travels across the entire width of the fabric.

Once you have torn a strip off the entire top of the fabric, your grain is perfectly straight and you can use the top edge and the selvage edge to line up the fabric to prepare for cutting. The torn edge will be wavy so you can press that edge to smooth things out. Not necessary, but sometimes helpful.

As a side note: not all fabrics tear well, so test on a scrap or just be careful. Also, some fabrics are really messed up and because they have been woven incorrectly do not tear on the straight grain. I bought a piece of flannel that tore at an angle. If that happens, I would suggest taking the fabric back – that is a manufacturing problem. BUT, most of the time tearing is a foolproof and easy way to find the straight grain.

p3310060.JPG

The top edge is the one that has been torn – see how nice and straight and even it is!

p3310062.JPG

This tutorial is for a standard size pillowcase, so the finished dimensions will be approximately 21×36.

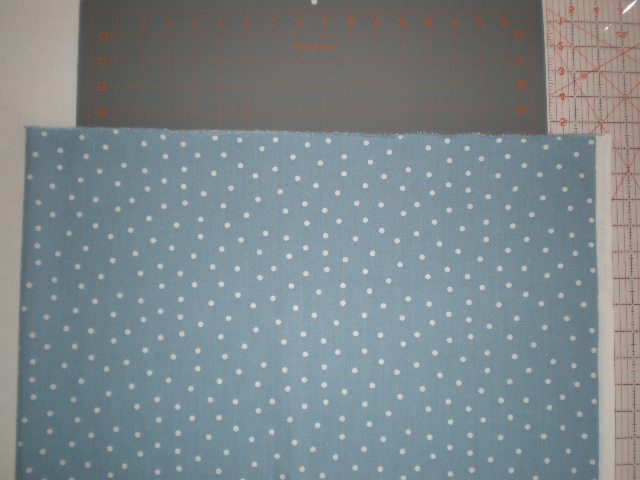
Using a rotary mat and cutter makes this process sooo much easier than using scissors.

Cut a piece for the main portion of the pillowcase from your fabric 43 inches wide x 30 inches long. You’ll end up folding the 43 side in half so it’s about 21 inches when you’re finished – the fabric is folded in the picture, so what you’re actually seeing is 30 x 21.

Most fabrics come between 40 and 45 inches wide, so you can measure the width exactly or just go with the natural width of the fabric you selected. Do measure it so you know how wide it actually is. If your fabric is 55-60 inches wide, you’ll want to cut it down to 43.

p3310061.JPG

I cut off the white strip on one of the selvage edges because it was wider than 1/2″. I’ll be using 1/2″ seams, so if I hadn’t cut that off it would have shown in the finished product.

p3310066.JPG

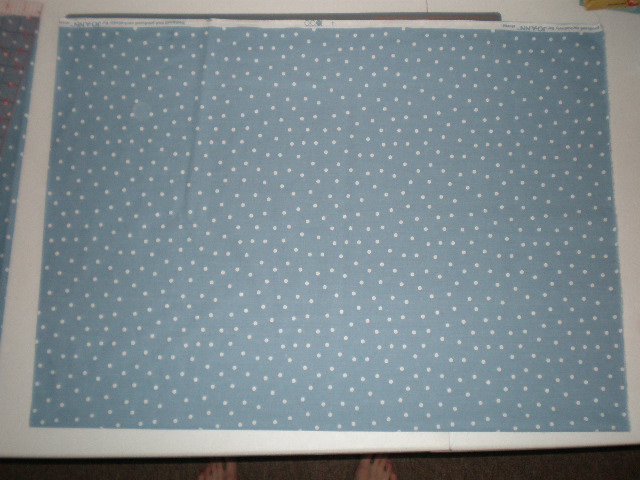
This second piece of fabric is for the end band. This edge is also not straight, so I’m going to repeat the process of tearing a strip off the top to even up the grain.

p3310070.JPG

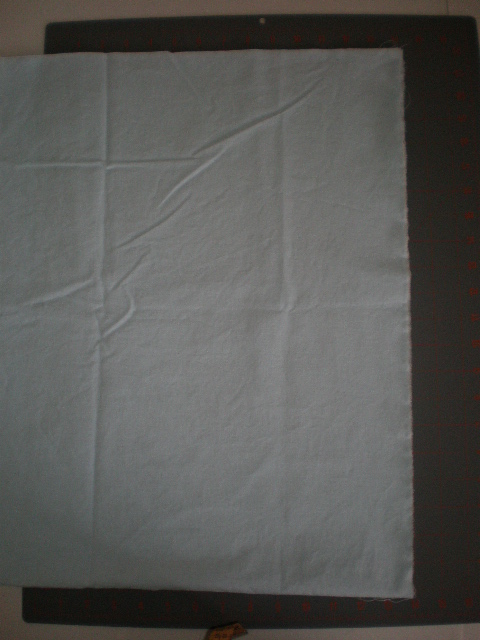
Can you see the difference in this picture and the one above? Starting out with a straight edge will make your finished product a higher quality because the grain will be lined up and the fabric will lay flat and smooth.

p3310073.JPG

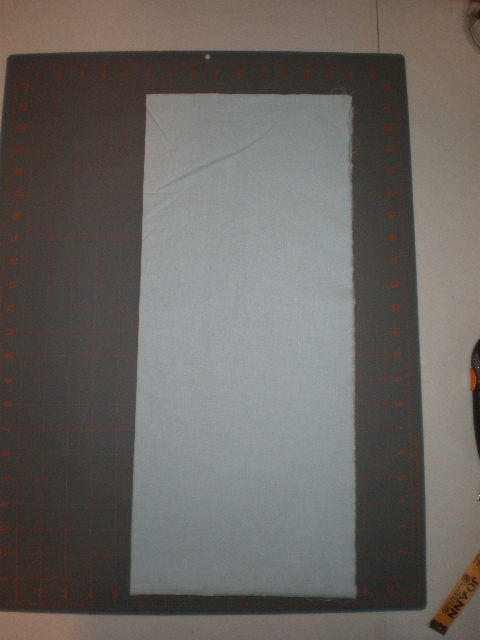
Cut from the end band fabric a strip 43×12. The fabric is folded in half again so the actual dimensions in this picture are 21×12.

What you should have now is two pieces of fabric, one measuring 43×30 (for the main part of the pillowcase) and the other 43×12 (for the end band).

You’ll also need to cut the band transition fabric now – I used ribbon so I didn’t have to cut anything, but if you’re using fabric, cut a strip 2-5 inches wide and 43 inches long.

p3310110.JPG

The next step is to sew the main pillowcase to the end band with the band transition strip in between. There are several ways you could do this; I’m going to tell you the easiest.

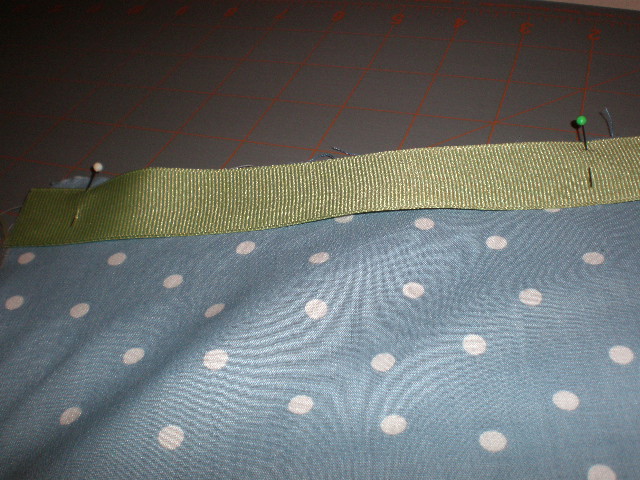
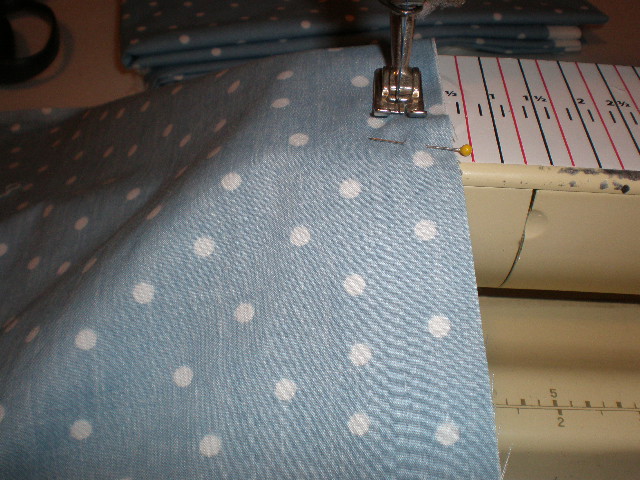
I used a piece of ribbon for the band strip. Pin the ribbon to the main pillowcase fabric, right sides together.

p3310111.JPG

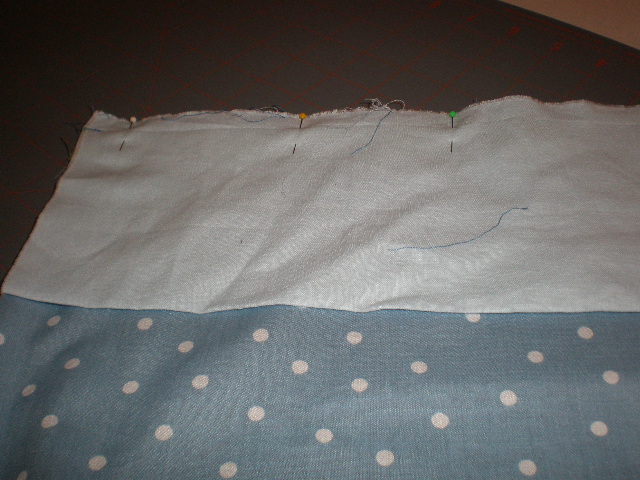
Fold the band fabric in half lengthwise and pin to the ribbon/main pillowcase, right sides together.

Don’t pin the fold edge, pin the other loose edge. So you should have two layers of the end band fabric that you’re sewing together with the other layers. You fold the end band in half and sew so that the opening of the pillowcase is already finished – you won’t have to hem the ends because the fold will be at the end. Doing it this way is much neater and easier than doing a single layer and hemming at the end.

p3310112.JPG

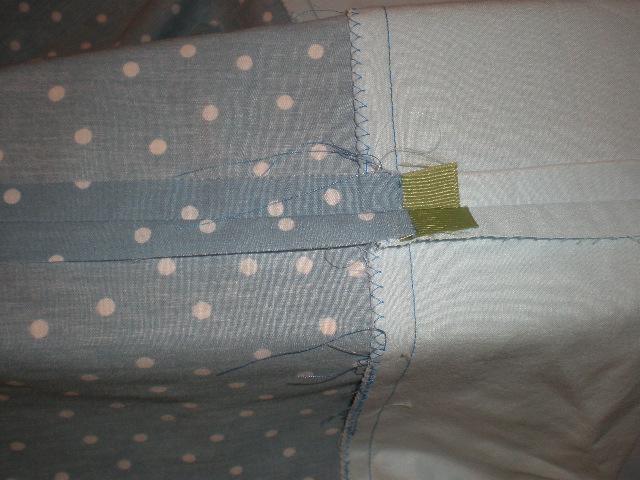
If you’ve pinned correctly, you should have the main pillowcase fabric, the ribbon/band transition strip, and the two layers of the end band, in that order. The right sides of the ribbon/band transition strip and the end band fabric will be facing the right side of the main pillowcase fabric.

(You could sew the main pillowcase and the end band, right sides together, and then sew the band transition strip onto the top, but that is a little more time consuming – sandwiching the strip in between the main part and the end band is faster and easier, but it does mean that one edge of the strip won’t be sewn down.)

p3310084.JPG

Sew the layers together at 1/2″.

p3310098.JPG

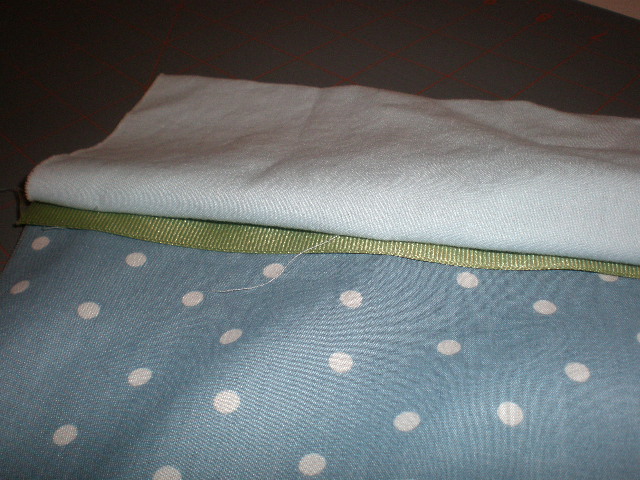
Press the seam allowances down toward the main part of the pillowcase.

p3310113.JPG

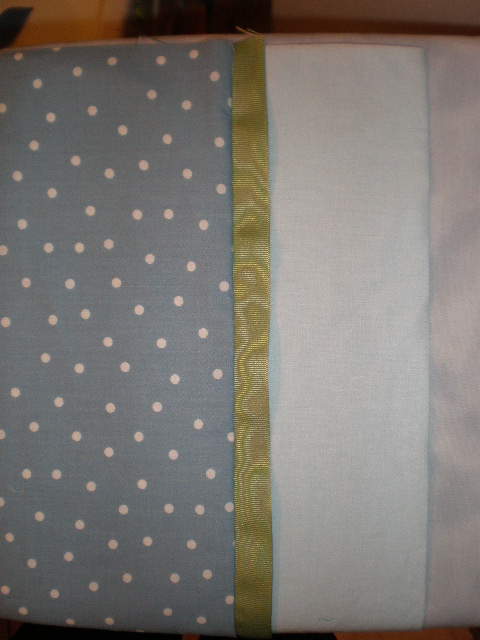
Turn over and press the top so the band transition strip lays flat.

p3310100.JPG

p3310108.JPG

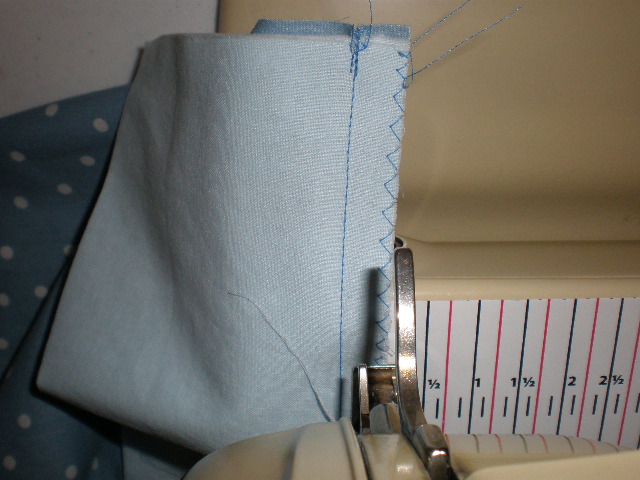
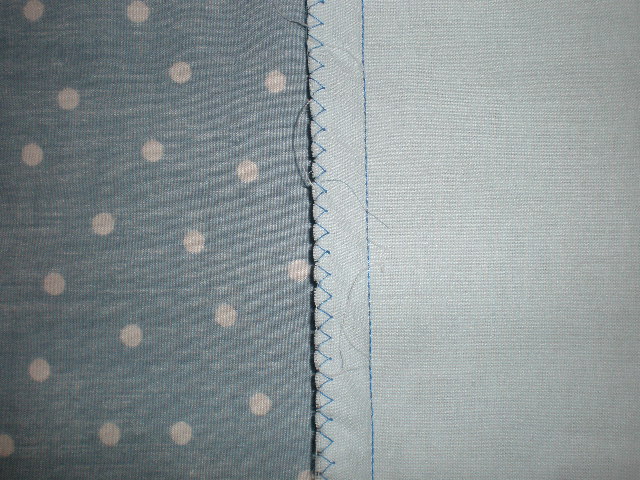
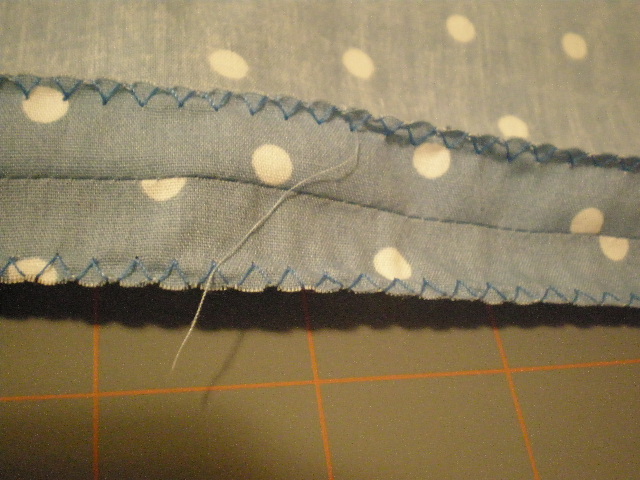
Finish the seams. I don’t have a serger, which is the best option, so I used a zigzag stitch. Pillowcases get washed frequently so you’ll need to finish the seams to keep them from unraveling.

p3310116.JPG

Now you are ready to pin and sew the side and bottom of the case closed. Because one edge of the case is a fold and the other adjacent edge is the opening, you only need to sew the other two edges.

p3310117.JPG

p3310121.JPG

Press the seams open using a sleeve board or point presser.

p3310122.JPG

Finish the seams with a serger or a zigzag stitch.

p3310123.JPGp3310126.JPG

VOILA!!! This simple pillowcase takes less than an hour to sew – using three different but coordinating fabrics is a little bit more work but the result is a wonderfully colorful pillowcase!

I hope this tutorial is helpful – I’m going to post a video of these same steps a little later. Let me know if I made any mistakes or left out any info. Good luck!!!

Share and Enjoy:
  • Twitter
  • Facebook
  • StumbleUpon
  • Kirtsy
  • Digg
  • del.icio.us

Related Posts

Tagged With

VanillaJoy uses the Canon Rebel XSi for all photos

RSS feed | Trackback URI

23 Comments »

Comment by mom2triplets04
2008-04-04 16:49:42

This is a really neat idea. I want to say thank you for sharing it. I have so much left over fabric from when I was quilting. I’m printing it up and hopefully one day when I have a free moment I’ll make some for my children.

(Comments wont nest below this level)
 
Comment by JHS
2008-04-06 14:07:11

Thanks for participating in this week’s Carnival of Family Life hosted by Pickel at My Two Boys. The Carnival will be live on Monday, April 7, 2008, so make sure you stop by and check out all of the other outstanding entries included in this week’s Edition!

(Comments wont nest below this level)
 
Comment by RecycleCindy
2008-04-08 12:08:43

What a wonderful MIFS project. I’m submitting it to Stumble so others can take advantage of your great tutorial. Best wishes!

(Comments wont nest below this level)
 
Comment by Susan B
2008-04-11 13:55:15

That sewing machine looks like a bernina 730. What foot are you using for your zig zag stitch? I have one too.

I have made several pillowcases for friends and family. My daughter loves dora so I made her a few; now she is moving on to disney princesses, so that one will be next. I bought a little pillow and make matching pillowcases for her doll, too.

This is my first visit to your web site – I like it!

(Comments wont nest below this level)
Comment by vanillajoy
2008-04-11 15:15:15

Susan,

I’m so glad you like my blog – thanks for letting me know, it means a lot to me!!!

I do have a Bernina 730 – my Grandma gave it to me and I love it. I would like a newer Bernina someday, but this one does the job just fine for now. It still sews great and feels substantial, unlike a lot of sewing machines these days. I used just the standard presser foot that I use for all normal sewing – I think it’s the zigzag embroidery foot?

Good luck with your pillowcases!

Kelsey


Comment by kacey
2008-04-21 07:47:31

This one caught my eye on your favorite scoops! How cute. It has me inspired to make some pillow shams for my bedroom.

(Comments wont nest below this level)
 
Comment by Marne
2008-08-26 14:56:12

Thanks…I am going to use your tutorial to make birthday pillowcases for my 3 kiddos. :)

(Comments wont nest below this level)
 
Comment by Stephanie Shumway
2008-08-28 17:53:46

This is so much fun! I made my kiddos pillowcases when I found some fabric that they like- batman and my little pony. Would make awesome birthday presents for kids! …As long as it’s cool fabric :o)

(Comments wont nest below this level)
 
Comment by Sue D
2008-08-29 11:40:29

Great tutorial! I had forgotten about finding the grain of fabric. I plan on making pillowcases for my granddaughter. After raising 4 boys I’ll have to go to the store for “girly” fabric!

(Comments wont nest below this level)
 
Comment by Casey Toney
2008-09-01 23:01:03

Kelsey:
I was a major sew-a-holic as a young girl. Never made a pillow case. I am going to be “gifted” my Mom’s sewing machine for both sewing projects and to stitch on my scrapbook pages. Do you have your own markings on the sewing machine for measuring? Love the pillow case. Oh Lord…do I have a long crafty to-do list. Thanks for posting this.

(Comments wont nest below this level)
 
Comment by Leah
2008-12-13 13:28:11

This is so perfect for a MAMA like me who loves making everything from scratch!
I already know the first pillowcase I am going to make! : ))) Thanks so much!!!!

(Comments wont nest below this level)
 
Comment by d best
2009-02-02 06:06:29

thank you!!
it made me finish my project…
GOOD NEWS!!
my teacher marked me 100 on that project because of you..
thank you again!!

(Comments wont nest below this level)
 
Comment by olivia
2009-02-05 14:15:52

thanks it helped a lot when making my pillowcase for my brothers room,thanks again!

(Comments wont nest below this level)
 
2009-04-22 07:01:26

[...] Pillowcase Tutorial [...]

(Comments wont nest below this level)
 
Comment by THE ALLIE
2009-05-24 09:08:16

I love this pillow case its ah-mazing! im making one for my friend who’s movin. me and my homes r gonna sign the light band, the second 2 largest one, with a fabric pen. Its ahmazin!

-TA

(Comments wont nest below this level)
 
Comment by Baba
2009-08-03 10:23:40

What a satisfying project! Those turned out so pretty! Can’t wait for my sewing room to be ready!

(Comments wont nest below this level)
 
Comment by Vera
2009-08-31 08:51:32

Well I found this turtorial to be Awesome…..
I am not a beginner although I am a beginner at making things other than quilts. I think your awesome. Do you think You could do this on a video?
I really loved the way you wrote everything down but I am not so advanced.
I thank you for putting this out there for everyone to read.
Happy Sewing,
Oh yeah I bought some fabric and I am going to see if I can apply your technique for making the pillow cases. Much love ,
Vera

(Comments wont nest below this level)
 
2009-09-01 12:51:33

[...] I would have preferred to do it with all one print, but like I said in my other post, it was originally meant to be 2 sets of toddler sheets & pillowcases!  Anyways I made the sheet on my own with out any pattern (it fits slim & deep mattresses AND those with toppers ), not cost effective unless you use a larger size sheet or getting the fabric cheap because it uses 4.5 yards, but it’s nice to have the freedom to choose!  I used this tutorial for the pillowcase… Vanilla Joy Pillowcase Tutorial [...]

(Comments wont nest below this level)
 
2009-11-03 05:58:18

[...] to Make a Pillowcase Use Kelsey’s easy How to Make a Pillowcase Tutorial at Vanilla Joy and enjoy your favorite fabrics every day of the [...]

(Comments wont nest below this level)
 
2009-11-12 17:20:58

[...] How To Sew/Make A Pillowcase – Bookmarked because the dimensions I usually use to make pillowcases are a bit on the large side, and I think I need to find better ones. Making your own pillowcase is so easy and fun, and they even make great gifts! [...]

(Comments wont nest below this level)
 
2009-12-11 01:11:30

[...] Make A Pillowcase [...]

(Comments wont nest below this level)
 
2010-01-14 13:03:22

[...] Pillowcase Tutorial [...]

(Comments wont nest below this level)
 
Comment by Wallis Bolz
2010-03-12 08:18:58

Thank you for the tutorial. What is the “seam guide” attached to the free arm of your sewing machine, the item with the red and blue lines? This looks so useful! (I, too, sew with a Bernina 730 Record.) Where do I find one? Wallis Bolz

(Comments wont nest below this level)
 
Name (required)
E-mail (required - never shown publicly)
URI
Your Comment (smaller size | larger size)
You may use <a href="" title=""> <abbr title=""> <acronym title=""> <b> <blockquote cite=""> <cite> <code> <del datetime=""> <em> <i> <q cite=""> <strike> <strong> in your comment.
Family Fun