I took a bookbinding class in college and that class was my top favorite. We learned how to make four different books, clamshell boxes, and how to decorate paper using walnut ink and paste. My teacher was such an inspiration – she helped me develop a deep love for making books and boxes.
We learned four different book techniques:
- coptic
- paper case
- Japanese stab
- flat back
I love all of them; I don’t think I can choose a favorite. Each binding is unique and serves a different purpose. Having learned these four methods and also a basic clamshell box, I have the knowledge to make all different variations on these standards. I haven’t really taken the opportunity to do this yet, but someday I will. And soon I’m going to write a tutorial on how to make a basic Japanese stab binding book. It’s so easy and fun and I use this all the time to make little notebooks for thoughts and just to keep in my purse.
So here are some of my books. Enjoy!
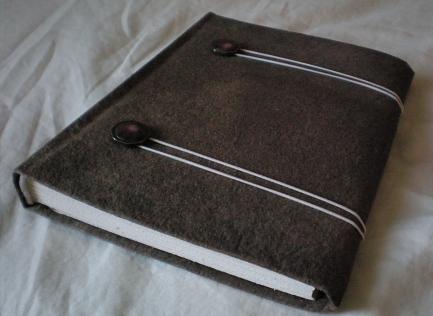
I made this flat back for my husband to use as a journal.
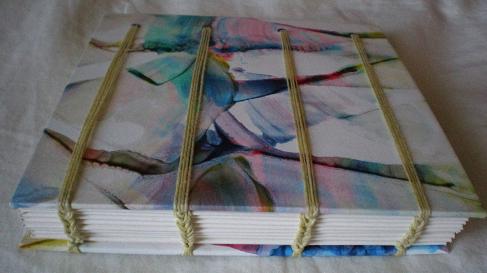
I love the coptic binding because it is so versatile and flexible. These three coptics are all a little different. The top left was my very first one, which we are now using as our “Blessings Journal.” Coptic bindings take some getting used to – if you don’t sew each stitch using the exact same tension the stitching ends up uneven. The hardest part about this binding is getting all the herringbone stitches to be the same shape.
My second one, the top right picture, was much better. I accidentally punched the holes in the front too close to the edges, which is why there are some extra holes in the covers. I had to come up with some way to hide my mistake. I use this book to keep notes on books I read and talks/presentations I hear. This book is just a place for me to keep my thoughts.
The bottom one is my most recent and most successful attempt. I doubled up the thread so the herrinbone stitches are a little bulkier with more visual weight and texture. Keeping four strands of thread straight and untangled was challenging, but well worth the extra effort. I also punched the holes on the opposite side of the cover so the thread would create an additional design across the front and back. I like experimenting with the hole placement to get a different look each time.
I painted this paper with paste, another favorite thing about this book. I love making paste paper because I can come up with beautiful designs without having to have a lot of artistic talent.
I think I’m going to use this book as a journal for my childhood memories.
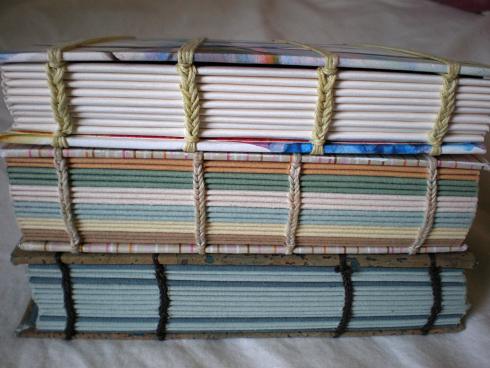
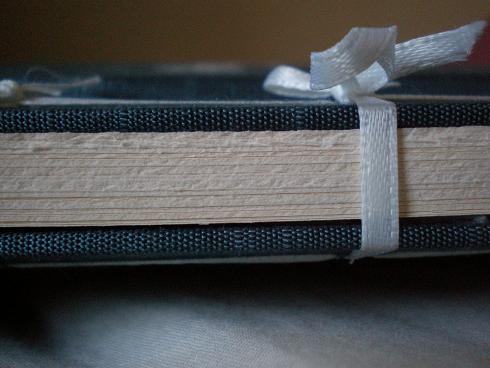
And here is a look at the spines of each of these books. The fun thing about the coptic book is the exposed spine. I experimented with different colors of paper and also with the placement and thickness of the sewing. Sewing is one of my favorite parts about making a book – it is always a reflective and rejuvenating experience.
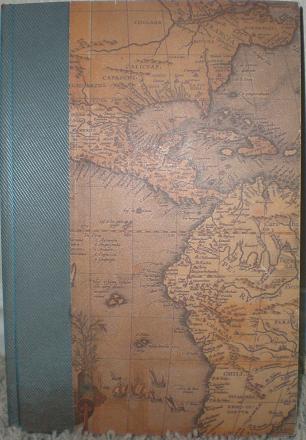
Paper case bindings are absolutely beautiful. The binding is made only with tag board and cave paper, which is one of the world’s most beautiful things. I love the texture of cave paper – sometimes I sit and hold this book and meditate to the rough feel of the paper. AAAhhh.
I have another book that is just plain cave paper with no closure mechanism that I use as a journal for my son. I write my thoughts and feelings about him so he can have a record of his infancy. I also use this to record his milestones and funny/new things he does each day.
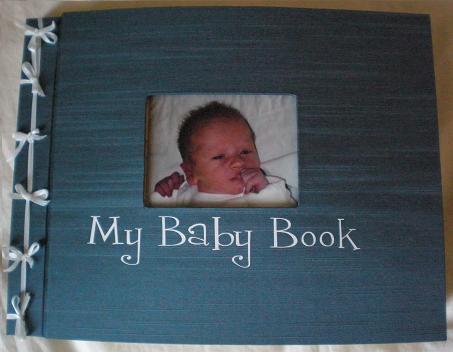
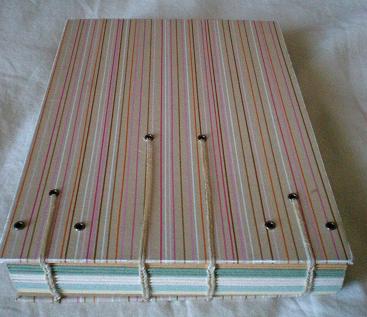
Finally, this is a baby book I made for my son using the Japanese stab binding. This one has pictures and journaling organized by month. Japanese stab is a great option for photo albums because you can easily insert stubs to create a thicker spine so that the book lays flat when all the pictures are inserted.
I wanted to make something special for his baby book although if I had it to do over I would just use a store bought album. I like the way this looks and how it’s personalized, but not having each page in a plastic sheet protector is not a good thing. The pages stick together in spots, and I have to worry about people getting fingerprints on the pictures. So although this binding is great for a photo album, there are some drawbacks.
I used vinyl lettering for the title – I wasn’t sure that the lettering would stick to fabric but it does. Even though there are some disappointments about how some things worked out, I still love this book. Isn’t it beautiful?!
I hope to continue making books throughout my life. I have many projects in mind, I just lack the time. As my children grow, I hope to instill in them my love of making, reading, and writing in books.


{ 11 comments… read them below or add one }